Quick Answer: The Best Gallery Wall Kits make the finished arrangement easier to predict before the first nail goes into the wall. Kate and Laurel Bordeaux Gallery Wall Kit is the most balanced starting point for a mixed-size, coordinated display, while SONGMICS Collage Picture Frames suit a cleaner black-frame look. Gallery Perfect is useful when a supplied hanging template matters, and Umbra Exhibit is the more flexible choice for people who expect to rearrange photos later.



Top Picks at a Glance
- Best Overall: Kate and Laurel Bordeaux Gallery Wall Kit combines assorted frame sizes with three complementary finishes for a collected look that still feels coordinated.
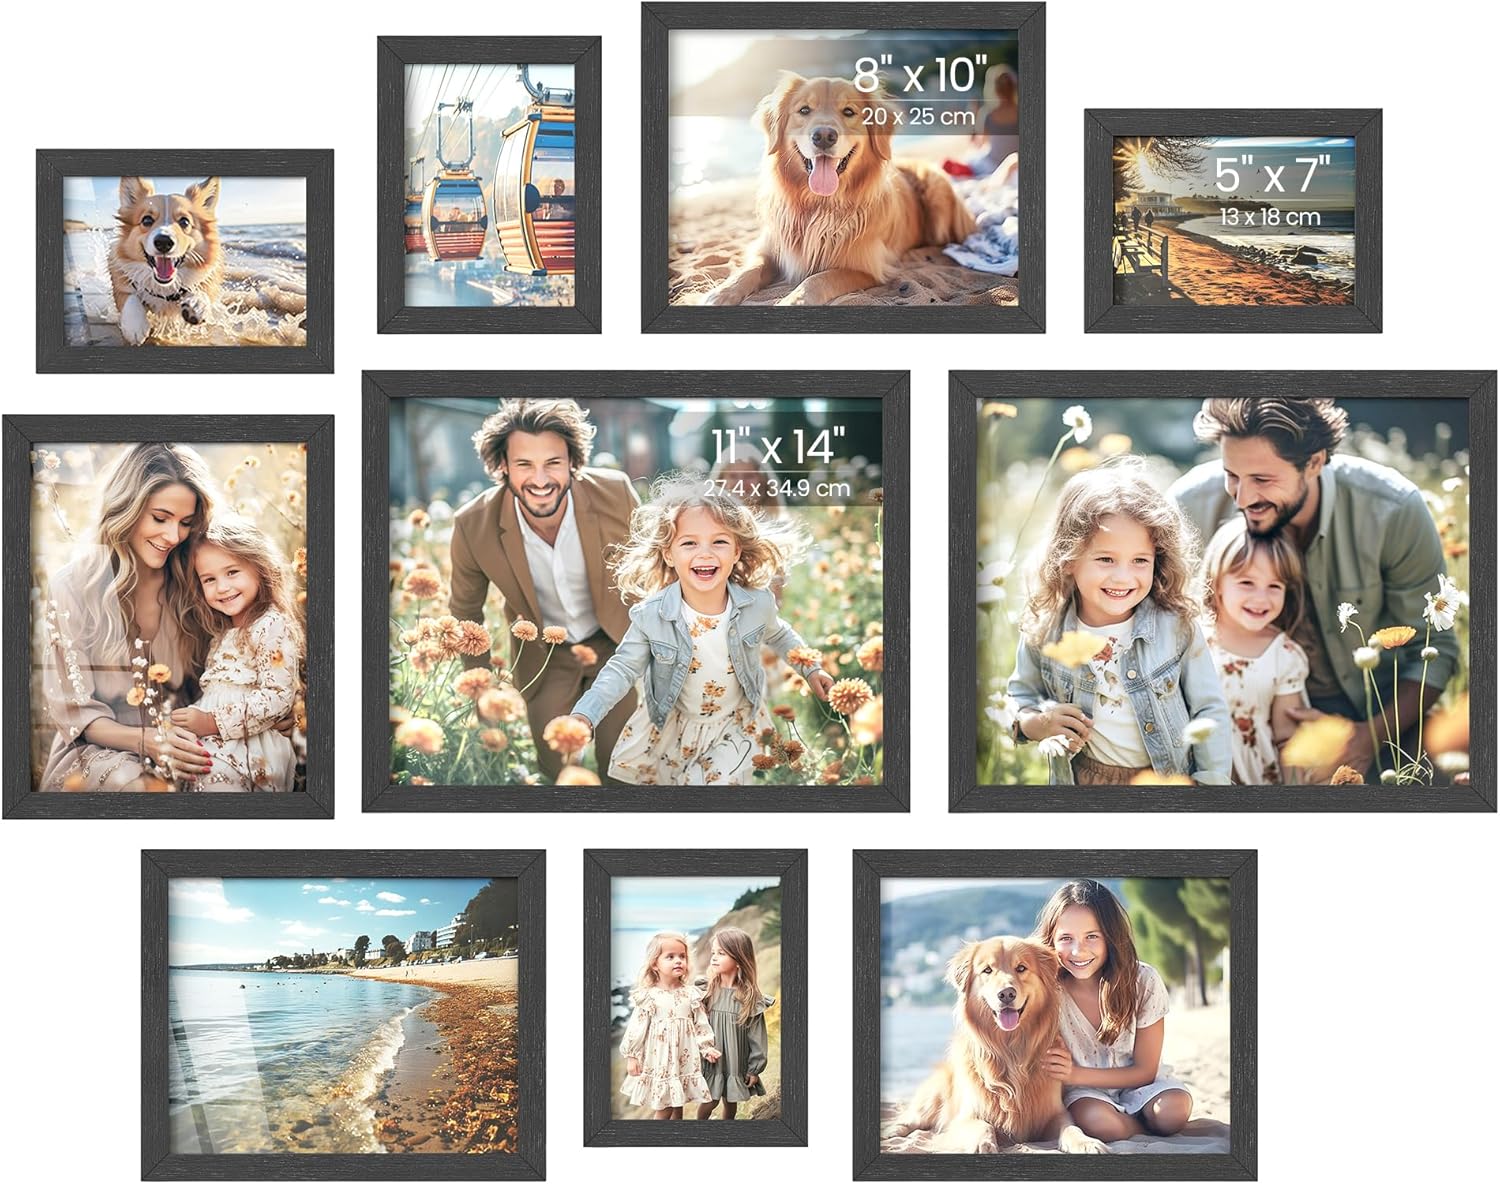
- Best Classic Black Set: SONGMICS Collage Picture Frames uses a consistent ink-black finish, glass fronts, and a practical mix of common photo sizes.
- Best Frame-and-Shelf Combination: Kate and Laurel Bordeaux Gallery Wall Frame and Shelf Kit adds three display shelves, giving small objects and layered pieces a place in the composition.
- Best Metal Frames: eletecpro Aluminum Gallery Wall Frame Set offers a gold metal profile and glass covers for a sharper, more formal presentation.
- Best for a Large Collage: upsimples Picture Frames Set includes a broad mix of smaller frames for filling a larger area or building an arrangement gradually.
- Best Template-Led Layout: Gallery Perfect 12-Piece White Square Photo Frame Set includes a hanging template and works well when a neat square composition is the goal.
- Best Adjustable Display: Umbra Exhibit Gallery Picture Frames suspend movable frames from a steel beam, reducing the need to remount every frame when the layout changes.
How to Choose the Best Gallery Wall Kits
Choosing the Best Gallery Wall Kits is less about finding the package with the most frames and more about choosing a system that fits the wall, the images, and your tolerance for installation work. A coordinated kit can solve several decisions at once, but it cannot correct a layout that is too wide, mounted too high, or filled with photos that do not suit the available openings.
Begin with the installed footprint. Product listings often emphasize individual frame sizes, yet the useful measurement is the width and height of the entire arrangement after spacing is added. A set of small frames can occupy more wall space than expected once two or three inches are left between pieces. Conversely, a kit that sounds large may feel visually weak over a wide sofa if all of its frames cluster near the center.
Next, choose the layout system. Mixed-size sets create an organic collage, matching square frames make a disciplined grid, shelf kits support layered objects, and beam or rail systems allow the frames to move. The Best Gallery Wall Kits for a first-time installer generally provide either a clear layout guide or a frame mix that can be rearranged without leaving awkward gaps.
Start With the Wall, Not the Frame Count
Measure the usable wall area and note furniture, light switches, thermostats, vents, door swings, and nearby corners. If the arrangement hangs over a console or sofa, treat the furniture as the visual anchor. A gallery that extends far beyond the furniture can look disconnected, while a tiny cluster may appear accidental. The visual center should also relate to normal eye level, not simply to the midpoint between the floor and ceiling.
Make a rough boundary with painter’s tape, then place paper rectangles inside it. This inexpensive test reveals whether the composition feels crowded and whether the outer edges make a stable shape. It also helps compare the Best Gallery Wall Kits before ordering, because you can reproduce each listed frame size with scrap paper and see the likely result at full scale.
Stairways need a different approach. Follow the rise of the stairs with an imaginary centerline rather than leveling the whole group to the floor. Hallways usually benefit from shallower frames and tighter control of projection. In a small room, a compact grid may feel calmer than an expansive mixed collage, even when both options hold the same number of images.
Choose a Layout Style That Matches the Room
Mixed-Size Coordinated Collage
A mixed-size kit balances personality with convenience. Different openings create a natural hierarchy, allowing one or two larger images to lead while smaller photos provide rhythm. Repeated frame finish, mat color, or image palette keeps the composition unified. Buyers comparing the Best Gallery Wall Kits for family photos often prefer this format because portrait and landscape images can coexist without every opening feeling identical.
The main trade-off is planning. Random placement rarely looks convincingly relaxed; it usually needs a hidden structure. Keep spacing reasonably consistent, align a few important edges, and distribute dark or visually heavy images across the group. If you want to understand standalone construction and glazing options before committing to a set, the guide to the best picture frames provides a useful comparison point.
Symmetrical Grid
A grid works well with square frames, repeated portrait openings, or a sequence of related art. It is easier to read from across a room and can make an eclectic photo collection feel organized. However, precision matters more. Small leveling errors and inconsistent gaps become obvious because every row and column creates a reference line.
The Best Gallery Wall Kits for grids include a template or make it easy to reproduce identical spacing. Confirm whether the stated measurement refers to the outside of the frame or the image opening. Mats can make a small print fit a larger frame, but a grid loses its uniform look if mat widths vary unexpectedly. For arrangements designed around many family photographs, also compare dedicated photo collage frames, which may combine several openings within fewer outer frames.
Shelf or Picture-Ledge Composition
Shelves and ledges let frames overlap slightly and make seasonal updates easier. They also accommodate small ceramics, books, or sculptural objects. A shelf-based kit suits renters who can mount a few strong supports but do not want a separate hole for every frame. It can also hide minor differences in frame height because the pieces share a common baseline.
The drawback is depth. Frames project farther into the room, collect more dust along the ledge, and may need restraints in active households. Before choosing this route, compare the kit’s shelf depth with the frame stands or moldings you intend to use. The guide to floating picture ledges explains another flexible approach when the included shelves are not wide enough.
Adjustable Beam or Rail Display
An adjustable beam system uses a shared top support with hanging rods, cables, or hooks. It creates fewer scattered mounting points and permits frames to slide or swap positions. This can be one of the Best Gallery Wall Kits for frequently changing exhibitions, children’s artwork, or a home office where displays evolve.
The visible suspension system becomes part of the design, so it will not disappear like ordinary frame hooks. Check the maximum supported load, the way each frame connects to the rod, and whether replacement components are available. This system is also less suitable when the goal is a traditional salon wall with frames tucked closely together.
Frame Materials, Glazing, and Mats
Frame material affects weight, edge definition, and the way a set relates to the room. Wood and wood-look frames add warmth and suit mixed finishes, but broad profiles can feel heavy in a dense collage. Slim metal frames create crisp lines and work well around graphic art. Lightweight engineered frames may be easier to hang in large groups, though corners and surfaces deserve careful inspection after delivery.
Glazing is equally important. Glass usually offers good clarity and scratch resistance, but it increases total wall load and can break during handling. Acrylic or other lightweight covers reduce weight and are practical for large sets, children’s rooms, and busy passages. Their trade-offs can include static, fine scratches, and reflections. Peel protective film from both sides when the listing indicates it is present; leaving one layer in place can make the image look cloudy.
Mats create visual breathing room and help standardize different image sizes. Verify the actual mat opening rather than assuming it equals the named photo size exactly. Openings are normally slightly smaller so the photo cannot fall through. The Best Gallery Wall Kits clearly distinguish outer frame dimensions, mat openings, and unmatted display sizes.
Posters and larger prints need a different sense of scale from snapshots. A gallery kit can still incorporate one large anchor piece, but its profile and glazing should not overwhelm the smaller frames. If oversized art will lead the arrangement, check suitable poster frame options and build the smaller kit around that fixed anchor.
Hardware and Installation Planning
Included hardware is convenient only when it matches the wall. Drywall, masonry, plaster, and wood paneling may require different anchors, and the fastener must support the loaded frame rather than the empty frame alone. Glass-front sets become substantially heavier after every piece is installed. Never assume a small nail is appropriate merely because it arrived in the package.
Arrange the full composition on the floor first. Take a photo, measure the outside edges, and label paper templates to match each frame. Mark the visual center and outer boundary on the wall. Start with an anchor frame near the center, then work outward rather than completing one side from top to bottom. This method makes accumulated spacing errors easier to control.
A supplied template can save time, but verify its printed scale and orientation before making holes. Tape it in place, check it with a level, and step back from several viewing positions. The Best Gallery Wall Kits make the installation sequence understandable, yet even a good template cannot account for a wall that slopes, furniture that is off-center, or an electrical feature hidden behind the paper.
After the first few frames are mounted, pause and reassess. Small adhesive bumpers on the lower corners can reduce shifting and protect paint. For suspended systems, confirm that rods and hooks are fully seated. For shelf kits, secure the shelf itself to suitable anchors before loading frames or decorative objects.
Important Trade-Offs to Consider
- More pieces versus easier alignment: A broad set fills space efficiently, but every additional frame adds another opening to prepare and another edge to level.
- Glass clarity versus weight: Glass can look crisp and resist routine scratching, while lightweight covers are easier to manage in a large installation.
- Template convenience versus flexibility: A fixed template speeds one approved layout; a freeform set allows more adaptation but requires more planning.
- Matching finish versus collected character: Uniform frames make varied images feel cohesive, while mixed finishes add warmth but need a common visual thread.
- Permanent hooks versus adjustable systems: Individual hooks look discreet; rails, beams, and ledges make later changes easier but remain visible or project from the wall.
These trade-offs explain why the Best Gallery Wall Kits differ by household. A precise white grid may be ideal in a bright hallway but too formal for travel memorabilia. A rustic mixed set may soften a living room yet compete with colorful artwork. Decide which limitation is easiest to live with rather than looking for a kit with no limitation at all.
Common Gallery Wall Mistakes
Buying by Quantity Alone
A high piece count does not guarantee a substantial arrangement. Small frames can require many photos while still creating limited visual impact. Compare outer dimensions and mock up the full footprint. The Best Gallery Wall Kits use size variety deliberately instead of treating quantity as the main benefit.
Confusing Photo Size With Frame Size
A frame described for an 8-by-10 photo may have a larger outside dimension, and a mat may reduce the visible opening. Record the crop-safe area of each image before printing. Faces and important details should not sit at the extreme edge where the mat or frame lip may cover them.
Hanging the Group Too High
Many arrangements float awkwardly near the ceiling because the installer treats the bottom row as a standalone frame. Judge the entire group as one large artwork. Its visual center should feel comfortable from the main viewing position and relate to any furniture below it.
Using Inconsistent Gaps Without a Plan
Spacing does not have to be mathematically identical, especially in an organic layout, but unexplained wide gaps divide one gallery into separate clusters. Choose a target reveal and vary it only where frame shape or a shelf makes that choice intentional.
Ignoring Future Changes
Photos fade, families add new images, and rooms get repainted. Keep a record of the layout and photo sizes. If regular updates are likely, prioritize front-loading frames, reusable mats, a ledge, or an adjustable suspension system instead of a tightly interlocked arrangement.
Buying Checklist for Best Gallery Wall Kits
- Measure the usable wall width and height, including nearby furniture and obstacles.
- Map the complete installed footprint with paper before ordering.
- Confirm every outer frame size, mat opening, and supported photo orientation.
- Choose between a mixed collage, grid, shelf, or adjustable hanging system.
- Check whether glazing is glass or lightweight plastic and estimate total mounted weight.
- Verify what hardware and template materials are included.
- Match anchors to drywall, plaster, masonry, paneling, or studs as appropriate.
- Decide whether finishes should match or share one unifying color or material.
- Plan how replacement photos will be loaded after the frames are on the wall.
- Inspect return conditions in case color, scale, or glazing differs from expectations.
Care and Updating the Display
Dust frames with a soft, dry cloth before using any cleaner. Apply a glazing-safe cleaner to the cloth rather than spraying it directly onto the frame, where liquid can run behind the glazing or stain a mat. Acrylic covers need gentle materials because paper towels and abrasive cleaners can leave fine marks.
Check hooks, anchors, shelves, rods, and frame backs periodically, particularly in high-traffic areas. Strong sunlight can fade photographs and prints, so rotate originals or use replaceable copies where exposure is unavoidable. When updating images, preserve some continuity in color, subject, or mat treatment so the gallery still reads as one composition.
The Best Gallery Wall Kits should remain useful after the first installation. Save spare hardware, template sheets, product instructions, and a photo of the finished layout. These small records make it easier to rehang the set after painting or moving.
How We Tested and Evaluated
We evaluated the Best Gallery Wall Kits through a research-based comparison of verified Amazon listing information rather than claiming hands-on use. We checked product identity, included frame formats, stated materials, glazing, mounting approach, templates, shelves, and adjustable components. We also considered whether the size mix supports a coherent layout and whether the installation method is understandable from the available information.
Our assessment gives extra weight to complete-system usefulness: how easily a buyer can estimate the footprint, prepare matching photos, mount the arrangement, and update it later. We also note predictable compromises such as added glass weight, the precision required by grids, the projection of shelves, and the visible hardware of suspended displays. Current availability and listing details can change, so confirm the selected finish and included components on the product page.
Frequently Asked Questions
How much wall space do gallery wall kits need?
The requirement depends on the full arrangement rather than one frame. Add the outer widths, planned gaps, and any offset rows, then make a paper mockup. The Best Gallery Wall Kits fit comfortably inside a clear visual boundary and do not crowd switches, corners, furniture, or door trim.
How much spacing should be left between frames?
A consistent gap of roughly a few inches is a common starting point, but frame scale and viewing distance matter. Smaller frames often look more connected with tighter spacing, while large pieces can tolerate more negative space. Test the arrangement at full size before drilling.
Is a hanging template necessary?
No, but it can make a grid or prescribed composition faster to install. Paper cutouts provide similar benefits for freeform sets. Always verify the template’s orientation and scale, level it, and compare it with the actual frame hardware before making holes.
Can gallery wall kits work in a rental?
Yes, subject to the lease and the wall surface. A ledge or beam system may consolidate mounting points, while lightweight frames may work with approved removable solutions. Do not exceed a removable fastener’s rated load, and remember that textured or delicate paint may not release cleanly.
Should every frame in a gallery wall match?
No. Matching frames emphasize the images and simplify a grid. Mixed finishes can feel collected and relaxed when they repeat at least one element, such as mat color, profile shape, image palette, or wood tone. Avoid adding so many unrelated finishes that no piece anchors the group.
How should portrait and landscape photos be mixed?
Use one or two larger images as anchors, then distribute portrait and landscape openings around them. Balance visual weight rather than mirroring every shape. Lay the complete group on the floor and rotate images until faces, dark areas, and strong colors feel evenly distributed.
Final Decision
The Best Gallery Wall Kits are the ones whose installed footprint, image openings, and mounting system suit the actual wall. Kate and Laurel Bordeaux Gallery Wall Kit is a versatile choice for a coordinated mixed-size display, SONGMICS offers a cleaner black-frame direction, Gallery Perfect supports a template-led grid, and Umbra Exhibit favors future rearrangement.
Measure first, reproduce the layout with paper, and confirm glazing and hardware before committing. Once those practical details align, choose the finish and composition that support your photos rather than competing with them.