A well-run laundry room is not just about having a working washer and dryer – it’s about having the right small tools organized and within reach. Two items that quietly make a huge difference are a reliable washer drain hose and a sturdy shoe wash bag. One keeps water moving safely out of your machine, and the other keeps your sneakers, cleats, and delicate items from getting destroyed in the drum. This guide walks you through building and organizing a laundry toolkit around these two essentials, so your laundry routine becomes faster, safer, and far less frustrating.
Why Your Laundry Toolkit Needs a System
Most laundry rooms accumulate tools haphazardly – a spare hose shoved behind the dryer, a mesh bag stuffed in a drawer, stain sticks rolling around under the sink. This clutter isn’t just annoying; it costs you time and increases the odds of a leak or a laundry mishap going unnoticed until it’s a bigger problem. Building a dedicated toolkit means every item has a home, a purpose, and a maintenance schedule.
The washer drain hose and the shoe wash bag are a good starting point because they solve two very different but very common laundry pain points: water management and item protection. Once those are dialed in, the rest of your toolkit (stain removers, lint brushes, wrinkle sprays) falls into place around them.
Step 1: Gather What You Need
Before you start organizing, assemble the core items. You don’t need to buy everything at once, but having a shopping checklist keeps you from missing something essential.
- A washer drain hose sized correctly for your machine (check your washer’s manual for the diameter, typically 1 to 1.25 inches internal diameter).
- Hose clamps or a quick-connect fitting kit for a leak-free seal.
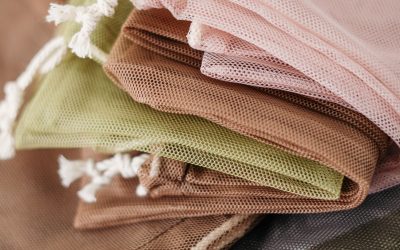
- A durable shoe wash bag with mesh panels sturdy enough to survive a full wash cycle.
- A small tote, bin, or wall-mounted rack to store hoses, bags, and clips together.
- Labels or a permanent marker for tagging storage bins.
- A flashlight or phone light for inspecting behind the machine.
If you’re shopping for a replacement hose, it helps to compare a few models rather than grabbing the first one you see at the hardware store. A quick look at washer drain hoses can save you from buying one that kinks easily or is the wrong length for your setup.
Step 2: Inspect and Install the Washer Drain Hose
The drain hose is the unsung hero of your laundry room. A cracked or poorly seated hose is one of the most common causes of laundry room flooding, and it’s often ignored because it’s tucked out of sight.
- Unplug the washer and shut off the water supply before touching any hose connections.
- Pull the machine away from the wall carefully so you can see the full length of the existing hose.
- Check for cracks, bulges, kinks, or discoloration along the hose – these are signs it needs replacing.
- If replacing, disconnect the old hose from both the washer outlet and the standpipe or drain connection.
- Measure the new hose against the distance from the washer to the drain point, leaving a little slack to avoid tension.
- Attach the new hose securely with a clamp at the washer end, and hook or secure the other end into the standpipe (never force it in so tightly that it seals completely – it needs an air gap to prevent siphoning).
- Run a short test cycle and watch the connection points for drips before pushing the washer back into place.
Once the hose is installed, label it with the install date on a small piece of tape near the connection. This small habit makes it easy to track when it’s due for inspection or replacement down the line.
Step 3: Set Up a Home for Your Shoe Wash Bag
A shoe wash bag protects both your shoes and your washing machine. Without one, shoelaces can tangle in the drum, rubber soles can knock against the machine walls, and delicate mesh uppers can tear. The bag itself is simple, but keeping it accessible and clean is where most people fall short.
- Pick a spot near your laundry supplies – a hook on the inside of a cabinet door works well, or a designated bin slot.
- After each use, rinse the bag if it picked up dirt from muddy shoes, and let it air dry fully before storing it – a damp bag stored in a closed bin will develop odor.
- Keep a small brush nearby specifically for knocking loose dirt off shoes before they go into the bag, so you’re not washing mud directly in your machine.
- Store a spare bag in your toolkit bin in case the primary one is in use or needs replacing.
If your current bag is thin, has weak zippers, or the mesh has already torn, it’s worth upgrading. Browsing a set of shoe wash bags can help you find one rated for repeated heavy-duty washing rather than a flimsy version that falls apart after a few cycles.
Step 4: Build Out the Rest of the Toolkit
With the drain hose and shoe bag handled, round out your toolkit with a few supporting items that solve common laundry annoyances:
- Lint roller or brush – for pre-treating pet hair on clothes before washing.
- Stain treatment pen or spray – kept where you can grab it the moment a spill happens.
- Wrinkle release spray – useful for garments that can’t go in the dryer or need a quick touch-up before wearing. If you don’t already have one, a look at best wrinkle release sprays can help you pick one that works fast without leaving a residue.
- Spare hose clamps and washers – cheap to keep on hand for quick fixes.
- Small notepad or phone note – to log hose install dates, filter cleaning dates, and any recurring issues.
Group these into a labeled caddy or a small drawer organizer so everything is visible at a glance instead of buried under towels or detergent bottles.
Safety Notes
- Always disconnect power and water before working on hose connections.
- Never force a shoe wash bag with hard-soled shoes or boots – check the bag’s weight and item limits first.
- Inspect drain hoses at least twice a year, and immediately after any unusual noise or vibration from the washer.
- Keep the shoe wash bag away from heat sources when drying; air-drying is usually safer for the mesh material.
- Store spare hose parts away from moisture to prevent rust on metal clamps.
Common Mistakes to Avoid
- Buying the wrong hose diameter. A hose that’s too narrow restricts water flow and can cause backups; always check your washer’s specs first.
- Overpacking the shoe bag. Cramming in multiple pairs reduces water circulation and can leave shoes only half-clean.
- Ignoring hose kinks. A kinked hose behind the machine restricts drainage even if it looks fine at the connection points.
- Storing damp bags in sealed containers. This leads to mildew that transfers back onto your shoes next use.
- Skipping the air gap at the drain standpipe. Sealing the hose too tightly into the standpipe can cause siphoning and slow drainage.
Building a Simple Maintenance Routine
A toolkit only stays useful if you check it periodically. Set a recurring reminder every few months to:
- Pull the washer out and visually inspect the drain hose for wear.
- Wipe down and air out the shoe wash bag even if it hasn’t been used recently.
- Restock any consumables – stain pens, wrinkle spray, hose clamps – that are running low.
- Confirm labels on your storage bins are still legible and accurate.
This five-minute routine prevents small issues, like a slowly weakening hose seam, from turning into an emergency mop-up session.
FAQ
How often should I replace my washer drain hose?
Most manufacturers recommend inspecting it every six months and replacing it every three to five years, or sooner if you notice cracking, bulging, or leaks at the connections.
Can I wash any type of shoe in a shoe wash bag?
Most mesh bags are designed for sneakers, cleats, and canvas shoes. Avoid washing shoes with heavy embellishments, leather uppers, or boots with metal hardware, as these can damage both the bag and your washing machine.
Where is the best place to store laundry tools?
A wall-mounted rack, over-the-door organizer, or a labeled bin near the washer works best. Keeping tools close to the machine reduces the chance you’ll skip using them out of inconvenience.
Do I need a separate hose for hot and cold water?
Yes, most washers use two separate supply hoses for hot and cold water, but the drain hose is a single line that carries wastewater out regardless of temperature.
What size shoe wash bag should I buy?
Choose a bag sized for one or two pairs at most. Overloading a larger bag reduces cleaning effectiveness and puts more strain on the washer drum.
Final Thoughts
Organizing your laundry toolkit around a dependable washer drain hose and a durable shoe wash bag solves two of the most common laundry headaches: unexpected leaks and damaged footwear. With a simple storage system, a quick maintenance routine, and the right supporting tools like wrinkle release spray on hand, your laundry room becomes far more efficient – and a lot less likely to surprise you with a puddle on the floor.